
Lunch boxes have been an essential part of our daily lives for decades. Whether it’s for school, work, or a picnic, a well-packed lunch box can make your day. But have you ever thought about creating your own lunch box? Not just packing it, but designing and crafting it from scratch? If you’re a DIY enthusiast or just someone looking for a unique lunch container, this guide is for you. Here’s how to create a lunch box tailored to your needs and style.

Before you start, think about who will be using the lunch box and for what purpose. Is it for a child’s school lunch, an office worker’s daily meal, or for outdoor activities?
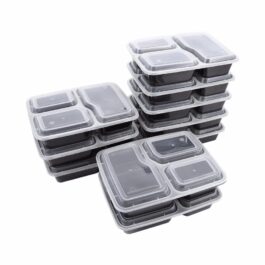
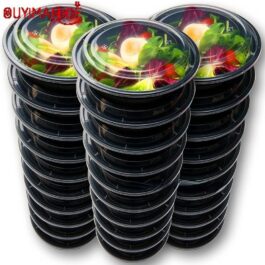
Depending on your preference and usage, you can choose from various materials:

Consider the amount of food you’ll typically pack. Do you need compartments for different food items? Or a single large space for bigger containers?
This is where you can get creative:
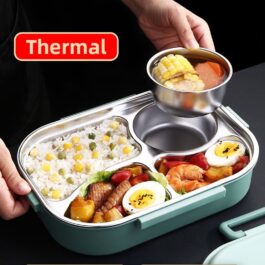
If you want your food to remain hot or cold, consider adding an insulated lining. You can purchase insulation material from craft stores and sew or glue it inside.
Think about including a reusable cutlery set, cloth napkins, or beeswax wraps to reduce waste.
Choose materials that are easy to clean. If you’re using fabric, ensure it’s machine-washable. For metal or plastic, check if it’s dishwasher-safe.
Ensure all materials used are food-safe. Avoid toxic paints or adhesives. If you’re using wood or bamboo, make sure to seal it properly to avoid mold.
Before using your lunch box regularly, pack a meal and carry it around to see if it’s comfortable and functional.
With your custom-made lunch box, every meal becomes a special occasion. Enjoy the fruits of your labor and the delicious food you’ve packed!
Conclusion
Creating your own lunch box can be a fun and rewarding project. Not only do you get a unique container for your meals, but you also contribute to reducing waste by avoiding disposable packaging. So, gather your materials and let your creativity shine!
Part 1: Introduction In today’s fast-paced world, the significance of a reliable lunch box cannot be overstated. Whether you’re a student rushing to class, an

Creating a prototype is an essential step in the product development process. It allows you to test, refine, and perfect your design before moving on

Lunchtime is a sacred moment in our day—a time to refuel, relax, and recharge. Whether you’re a busy professional, a student, or simply someone who

Lunch boxes have been an essential part of our daily lives for decades. Whether it’s for school, work, or a picnic, a well-packed lunch box

Lunchtime is an essential part of every child’s day, and having a reliable lunch box that can be easily attached to a backpack is crucial

How to Connect a Lunch Box to a Backpack: A Step-by-Step Guide Carrying a lunch box separately while also wearing a backpack can be cumbersome,
48 Responses
levees xyandanxvurulmus.ZmDG2ZAMw5F5
escort vurgunyedim.T6fa4CxcUjGs
bahis siteleri porn yaralandinmieycan.jkUuxl3JuzAa
seksi siteler citixx.FOEgVyN7ZHwo
fuck hyuqgzhqt.9l4KentTkBJ7
sektor benim zaten amin evladi ewrjghsdfaa.IiQM0wiKK5qX
eskort siteleri wrtgdfgdfgdqq.NH3KxdORMTmH
sexax wrtgdfgdfgdqq.aTbeXySNSHlL
Great insights! I never thought about it that way.If anyone wants to read the topic in more details then visit 8xbet
Your passion for the topic is evident. Impressive!If anyone wants to read the topic in more details then visit 8xbet
Your writing style is engaging and informative.If anyone wants to read the topic in more details then visit 8xbet
Your insights are a valuable contribution to the discussion.If anyone wants to read the topic in more details then visit 8xbet
Incredible post! Looking forward to more content.If anyone wants to read the topic in more details then visit 8xbet
house porn hepxhupx.v4uLJ5mfq5vA
porn sex juljulfbi.XafO573BmVGH
fuck google bjluajszz.xclqqpNBjROJ
am siteleri bxjluajsxzz.Sc88cYhaHMXY
food porn 0qbxjluaxcxjsxzz.LluqY8ud5rt2
fuck google
fixbet porn sex
tipobet porn sex
child porn
anal siteleri footballxx.TreF0kIOjCMF
fuck mobileidn.gpCaKgFhfZP5
porn bingoxx.V489XEUcvnpp
craft porn 250tldenemebonusuxx.9W2GLKVSVLm4
anal sikis siteleri eyeconartxx.Tegh6yf1a1VV
porno vvsetohimalxxvc.HUh3V2Xkeitu
porn siteleri tthighereduhryyy.Xi3XWlvmwNB
download 4k pron gghkyogg.hU4VkOjrjRt
4k hd porn video ggjennifegg.rlMmvURqzEE
download 4k porn video ggjinnysflogg.UofraHchYqi
fashionflag porn download 4k fashionflag.ccW9262XSN0
goodhere Girl Masturbating porn vurucutewet.3dw5uuKllke
ladyandtherose Anal porn backlinkseox.aw7t4e7Xcuw
तिकड़ी के अश्लील hjkvbasdfzxzz.EmS0qzYuhcy
ग्रुप सेक्स के बारे में txechdyzxca.Lp9XqcNzVu7
एशियाई अश्लीलता hkyonet.Lx2uyxdzzGR
ਕਿਸ਼ੋਰ ਪੋਰਨੋਗ੍ਰਾਫੀ madisonivysex.6hXYf5zoARu
ladesbet ਡੀਪੀ ਪੋਰਨ ladesinemi.3mk2A0l4aAs
ladesbet 有名人のポルノ ladestinemi.SjEzfQeFPiH
Benim Eski Esim Duygu Benden baska herkese vermis 😀
WOW just what I was looking for. Came here by searching for
секс мамы
Great blog here! Also your site loads up fast! What web host are youu
using? Can I get your affiliate linhk to your host?
I wish my web site loaded up ass quickly as yours lol
Here is my website: 카지노사이트
Superb, what a webpage it is! This web site presents helpful facts to us, keep it up.
I think this is among the most vital information for me. And i’m glad reading your article. But wanna remark on few general things, The web site style is great, the articles is really nice : D. Good job, cheers
Hi, I do think this is an excellent site. I stumbledupon it 😉 I’m
going to return once again since i have book marked it. Money and freedom is the greatest way to change, may
you be rich and continue to help others.